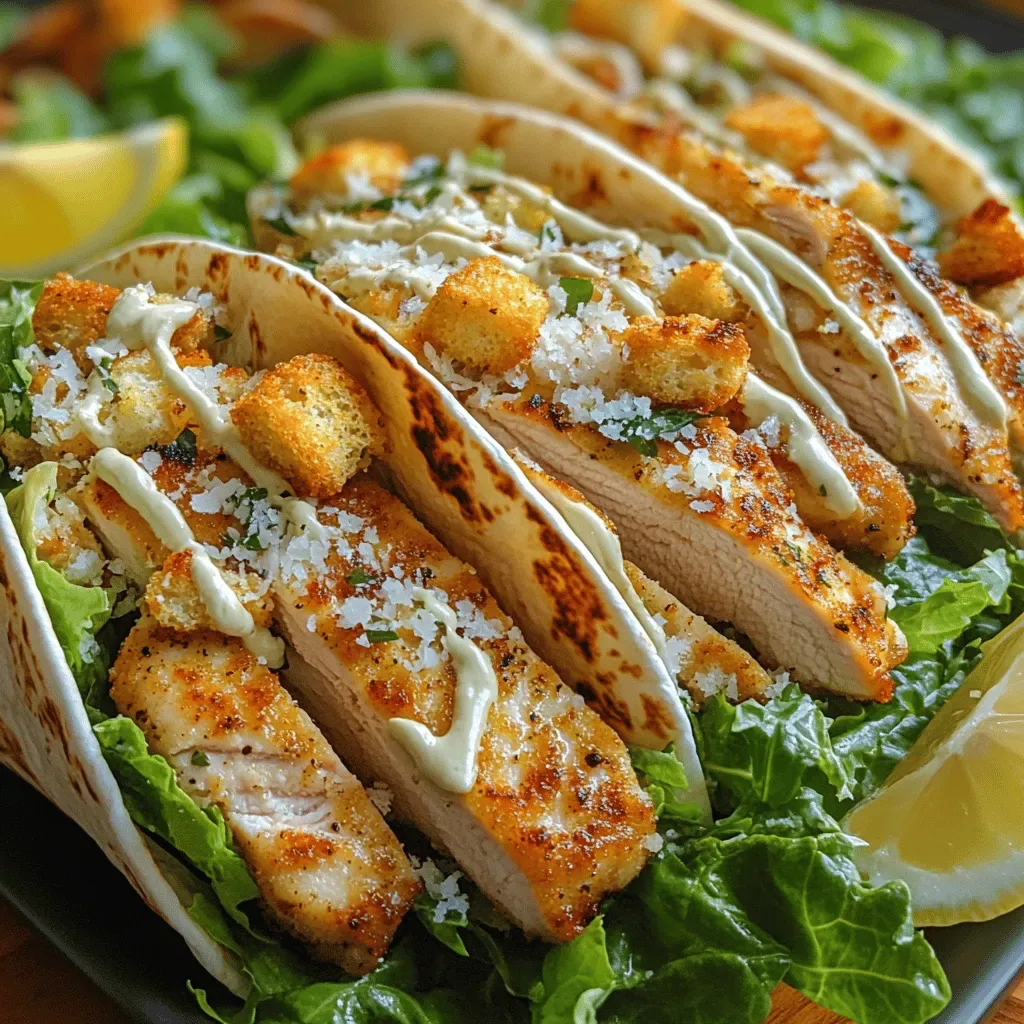
Imagine biting into a warm tortilla that holds a perfectly crisp chicken strip, tangy Caesar dressing, and a burst of fresh greens—all in one handheld masterpiece. This is what makes Crispy Chicken Caesar Wraps a standout lunch or dinner option that feels both indulgent and wholesome.
What sets this wrap apart is the marriage of a golden, seasoned crust on the chicken with the classic, umami‑rich Caesar sauce, all balanced by crisp lettuce and juicy tomatoes. The contrast of textures and the bright lemon‑pepper finish keep every bite exciting.
Busy professionals, active families, and weekend brunch enthusiasts will all love this dish. It works beautifully for a quick weekday meal, a picnic‑ready lunch, or a casual dinner that doesn’t require a table‑setting.
The process is straightforward: marinate the chicken, coat it in a crunchy breadcrumb mix, pan‑sear to lock in juices, whisk a speedy Caesar dressing, then assemble everything in a soft wrap. In under an hour you’ll have a restaurant‑quality wrap ready to devour.
Why You'll Love This Recipe
Crunch Meets Cream: The panko‑coated chicken delivers a satisfying crunch while the Caesar dressing adds a silky, garlicky richness that balances texture perfectly.
Speedy Assembly: From pan‑searing to wrap‑up, the entire recipe stays under 45 minutes, making it ideal for hectic weeknights without sacrificing flavor.
Customizable Core: Swap proteins, tweak the dressing, or choose gluten‑free tortillas—this recipe bends to your dietary needs while keeping its signature taste.
Portable Perfection: Wrapped tightly, each serving stays intact for lunches on the go, picnics, or a satisfying snack between meetings.
Ingredients
The magic of these wraps begins with a few carefully chosen components. The chicken is brined in buttermilk to stay juicy, then coated in a blend of panko and Parmesan for that irresistible crunch. The Caesar dressing is built from mayo, Dijon, lemon, and anchovies, delivering depth without the heaviness of a traditional recipe. Fresh romaine, tomatoes, and red onion provide crunch and brightness, while the tortilla holds everything together in a soft, slightly toasted cradle.
Main Ingredients
- 2 boneless, skinless chicken breasts
- 1 cup buttermilk
- 1 cup panko breadcrumbs
- ½ cup grated Parmesan cheese
Caesar Dressing
- ⅓ cup mayonnaise
- 2 teaspoons Dijon mustard
- 1 tablespoon fresh lemon juice
- 1 teaspoon Worcestershire sauce
- 2 cloves garlic, minced
- 2 anchovy fillets, minced (optional)
- ¼ cup grated Parmesan cheese
Seasonings & Garnish
- 1 teaspoon garlic powder
- 1 teaspoon smoked paprika
- Salt and freshly ground black pepper, to taste
- 2 tablespoons olive oil (for pan‑searing)
Wrap & Fresh Fillings
- 4 large flour tortillas or whole‑wheat wraps
- 2 cups romaine lettuce, chopped
- ½ cup cherry tomatoes, halved
- ¼ cup red onion, thinly sliced
Together these ingredients create a harmony of flavor and texture. The buttermilk bath tenderizes the chicken while the panko‑Parmesan crust adds a golden crunch. The homemade Caesar dressing supplies the classic umami, lemony bite and creamy coat without overwhelming the palate. Fresh lettuce, tomatoes, and onion inject crispness and a burst of juiciness, while the warm tortilla keeps everything neatly together for an easy‑to‑eat handheld delight.
Step-by-Step Instructions
Preparing the Chicken
Start by placing the chicken breasts in a shallow dish and covering them with 1 cup buttermilk. Let them marinate for at least 15 minutes (or up to 2 hours) in the refrigerator. The acidity in the buttermilk gently breaks down protein fibers, guaranteeing a moist interior once cooked.
- Dry & Season. Remove chicken from the buttermilk, pat dry with paper towels, then sprinkle both sides with salt, pepper, garlic powder, and smoked paprika. This dry rub creates a flavorful crust.
- Coat in Crunch. Set up a shallow bowl with 1 cup panko breadcrumbs mixed with ½ cup grated Parmesan. Dredge each piece, pressing gently so the coating adheres evenly.
- Sear the Chicken. Heat 2 tablespoons olive oil in a large skillet over medium‑high heat. Once shimmering, lay the coated breasts in the pan. Cook 4‑5 minutes per side, watching for a deep golden‑brown crust. A visual cue is a uniform amber color and a firm, non‑sticky surface.
- Finish in the Oven. Transfer the skillet to a pre‑heated 375°F (190°C) oven and bake for 8‑10 minutes, or until the internal temperature reaches 165°F (74°C). This final bake ensures the coating stays crisp while the meat finishes cooking evenly.
- Rest. Remove from the oven, let rest on a cutting board for 5 minutes, then slice into thin strips. Resting allows juices to redistribute, preventing a dry bite.
Making the Caesar Dressing
While the chicken rests, whisk together the creamy base. In a medium bowl combine ⅓ cup mayonnaise, 2 teaspoons Dijon mustard, 1 tablespoon lemon juice, 1 teaspoon Worcestershire sauce, and the minced garlic and anchovies. The anchovies add depth without a fishy taste.
- Incorporate Cheese. Fold in ¼ cup grated Parmesan until the mixture is smooth and slightly thickened. The cheese acts as a natural emulsifier, binding the dressing.
- Season. Add a pinch of salt and a grind of black pepper. Taste and adjust lemon or mustard if you prefer more acidity or tang.
- Chill. Cover and refrigerate for at least 10 minutes; this allows the flavors to meld and the dressing to thicken slightly, making it easier to spread.
Assembling the Wraps
Lay each tortilla flat on a clean surface. Spread a generous spoonful of the chilled Caesar dressing across the center, leaving a half‑inch border. The dressing acts as both sauce and glue for the fillings.
- Add Greens. Sprinkle 2 cups chopped romaine over the dressing, followed by ½ cup cherry tomatoes and ¼ cup red onion. The vegetables provide crunch and freshness.
- Layer Chicken. Arrange the sliced crispy chicken strips on top of the vegetables. The hot chicken will slightly melt the dressing, creating a glossy coating.
- Roll & Slice. Fold the sides of the tortilla inward, then roll tightly from the bottom edge up. Slice each wrap diagonally for a classic presentation.
Final Warm‑Up (Optional)
If you prefer a toasted exterior, place the assembled wraps seam‑side down on a hot skillet for 1‑2 minutes, pressing gently. You’ll hear a faint sizzle and see the tortilla turn golden, adding an extra layer of texture without compromising the crisp chicken inside.
Tips & Tricks
Perfecting the Recipe
Buttermilk Time. Let the chicken soak for at least 15 minutes; longer (up to 2 hours) yields extra tenderness and a subtle tang that brightens the overall flavor.
Even Coating. Press the breadcrumb mixture firmly onto the chicken and let it sit for a minute before searing; this prevents the crust from falling off during cooking.
Temperature Check. Use a meat thermometer; 165°F guarantees safety while keeping the chicken juicy. Overcooking quickly dries out the meat.
Rest Before Slicing. A 5‑minute rest lock in juices, ensuring each bite stays moist rather than watery.
Flavor Enhancements
Add a drizzle of extra‑virgin olive oil and a sprinkle of freshly grated Parmesan just before serving for extra richness. A few dashes of hot sauce or a pinch of smoked sea salt can elevate the flavor profile without overwhelming the classic Caesar taste.
Common Mistakes to Avoid
Avoid washing the chicken after the buttermilk soak; excess moisture prevents a proper crust. Also, don’t overcrowd the skillet—crowding creates steam, which makes the coating soggy instead of crisp.
Pro Tips
Use Fresh Parmesan. Freshly grated cheese melts better and adds a brighter, nuttier flavor than pre‑grated varieties.
Season the Dressing. A tiny pinch of cayenne or a splash of white wine vinegar can add complexity without altering the classic Caesar profile.
Warm the Tortillas. Lightly heating the wraps before assembly makes them more pliable and prevents tearing when you roll.
Slice Chicken Thin. Thin strips distribute the crunchy texture evenly throughout each bite, ensuring every mouthful has a perfect chicken‑to‑vegetable ratio.
Variations
Ingredient Swaps
Swap chicken for turkey cutlets, pork tenderloin, or even crispy fried tofu for a vegetarian version. Replace panko with crushed cornflakes for extra crunch, or use gluten‑free breadcrumbs if needed. For a lighter dressing, blend Greek yogurt with the mayo in a 1:1 ratio.
Dietary Adjustments
Choose gluten‑free tortillas or lettuce leaves for a low‑carb wrap. Omit anchovies and add a splash of capers for a vegetarian umami boost. For keto lovers, replace honey‑sweetened sauces with a dash of erythritol and keep the carb count low.
Serving Suggestions
Pair the wraps with a side of seasoned sweet‑potato fries, a simple quinoa salad, or a tangy cucumber‑dill slaw. A chilled glass of crisp white wine or sparkling water with lemon completes the meal beautifully.
Storage Info
Leftover Storage
Cool the chicken and dressing to room temperature before transferring to airtight containers. Store the chicken strips separately from the wraps to keep tortillas from getting soggy. Refrigerate for up to 3 days, or freeze chicken strips in a zip‑top bag for up to 2 months.
Reheating Instructions
Reheat chicken strips in a 350°F oven for 8‑10 minutes, or briefly in a skillet over medium heat until warmed through and the crust regains its crunch. Refresh the dressing by whisking in a splash of milk or water if it thickens too much.
Frequently Asked Questions
These Crispy Chicken Caesar Wraps bring together the beloved flavors of a classic Caesar salad with the satisfying crunch of a perfectly fried chicken strip, all wrapped in a convenient handheld. By following the step‑by‑step guide, using fresh ingredients, and applying the pro tips, you’ll create a versatile meal that works for lunch, dinner, or a snack on the go. Feel free to experiment with protein swaps or extra toppings—cooking is an adventure, and this recipe is your perfect starting point. Enjoy every bite!